
Experimenting with UV resin - Charms
Playing With Light: Experimenting With UV Resin & Acrylic Inks for Necklace Charms
Some days in the studio are about precision.
And some days are about curiosity, mess, and “what happens if I try this?”
Today was proudly the second kind.
I spent the day experimenting with UV resin and acrylic inks to create colorful, abstract necklace charms—and along the way, I learned a lot about flow, layering, timing, and letting the materials do some of the creative work for me.
If you’re curious about combining UV resin and acrylic inks, here’s a technique-focused breakdown of what worked, what surprised me, and what I’ll definitely do again.
Materials Used
Before we jump in, here’s what I had on the table:
- UV resin
- UV lamp
- Acrylic inks (fluid, highly pigmented)
- Silicone molds (small charm shapes)
- Toothpicks or fine stir sticks
- Nitrile gloves
- Nonstick craft mat
- Jump rings & drill (for finishing)
💡 Tip: Acrylic inks behave differently than alcohol inks—don’t assume they’ll act the same in resin.
Technique 1: Thin Layers Are Your Best Friend
The biggest lesson right out of the gate?
Less resin, more control.
What I did:
- Poured a thin base layer of UV resin into the mold
- Added just 1–2 drops of acrylic ink
- Gently swirled using a toothpick (not over-mixing!)
- Cured immediately
What I learned:
- Thin layers keep the ink from sinking or clumping
- UV resin cures fast, so you can “freeze” beautiful moments in the swirl
- Overworking the ink muddies the color—stop sooner than you think
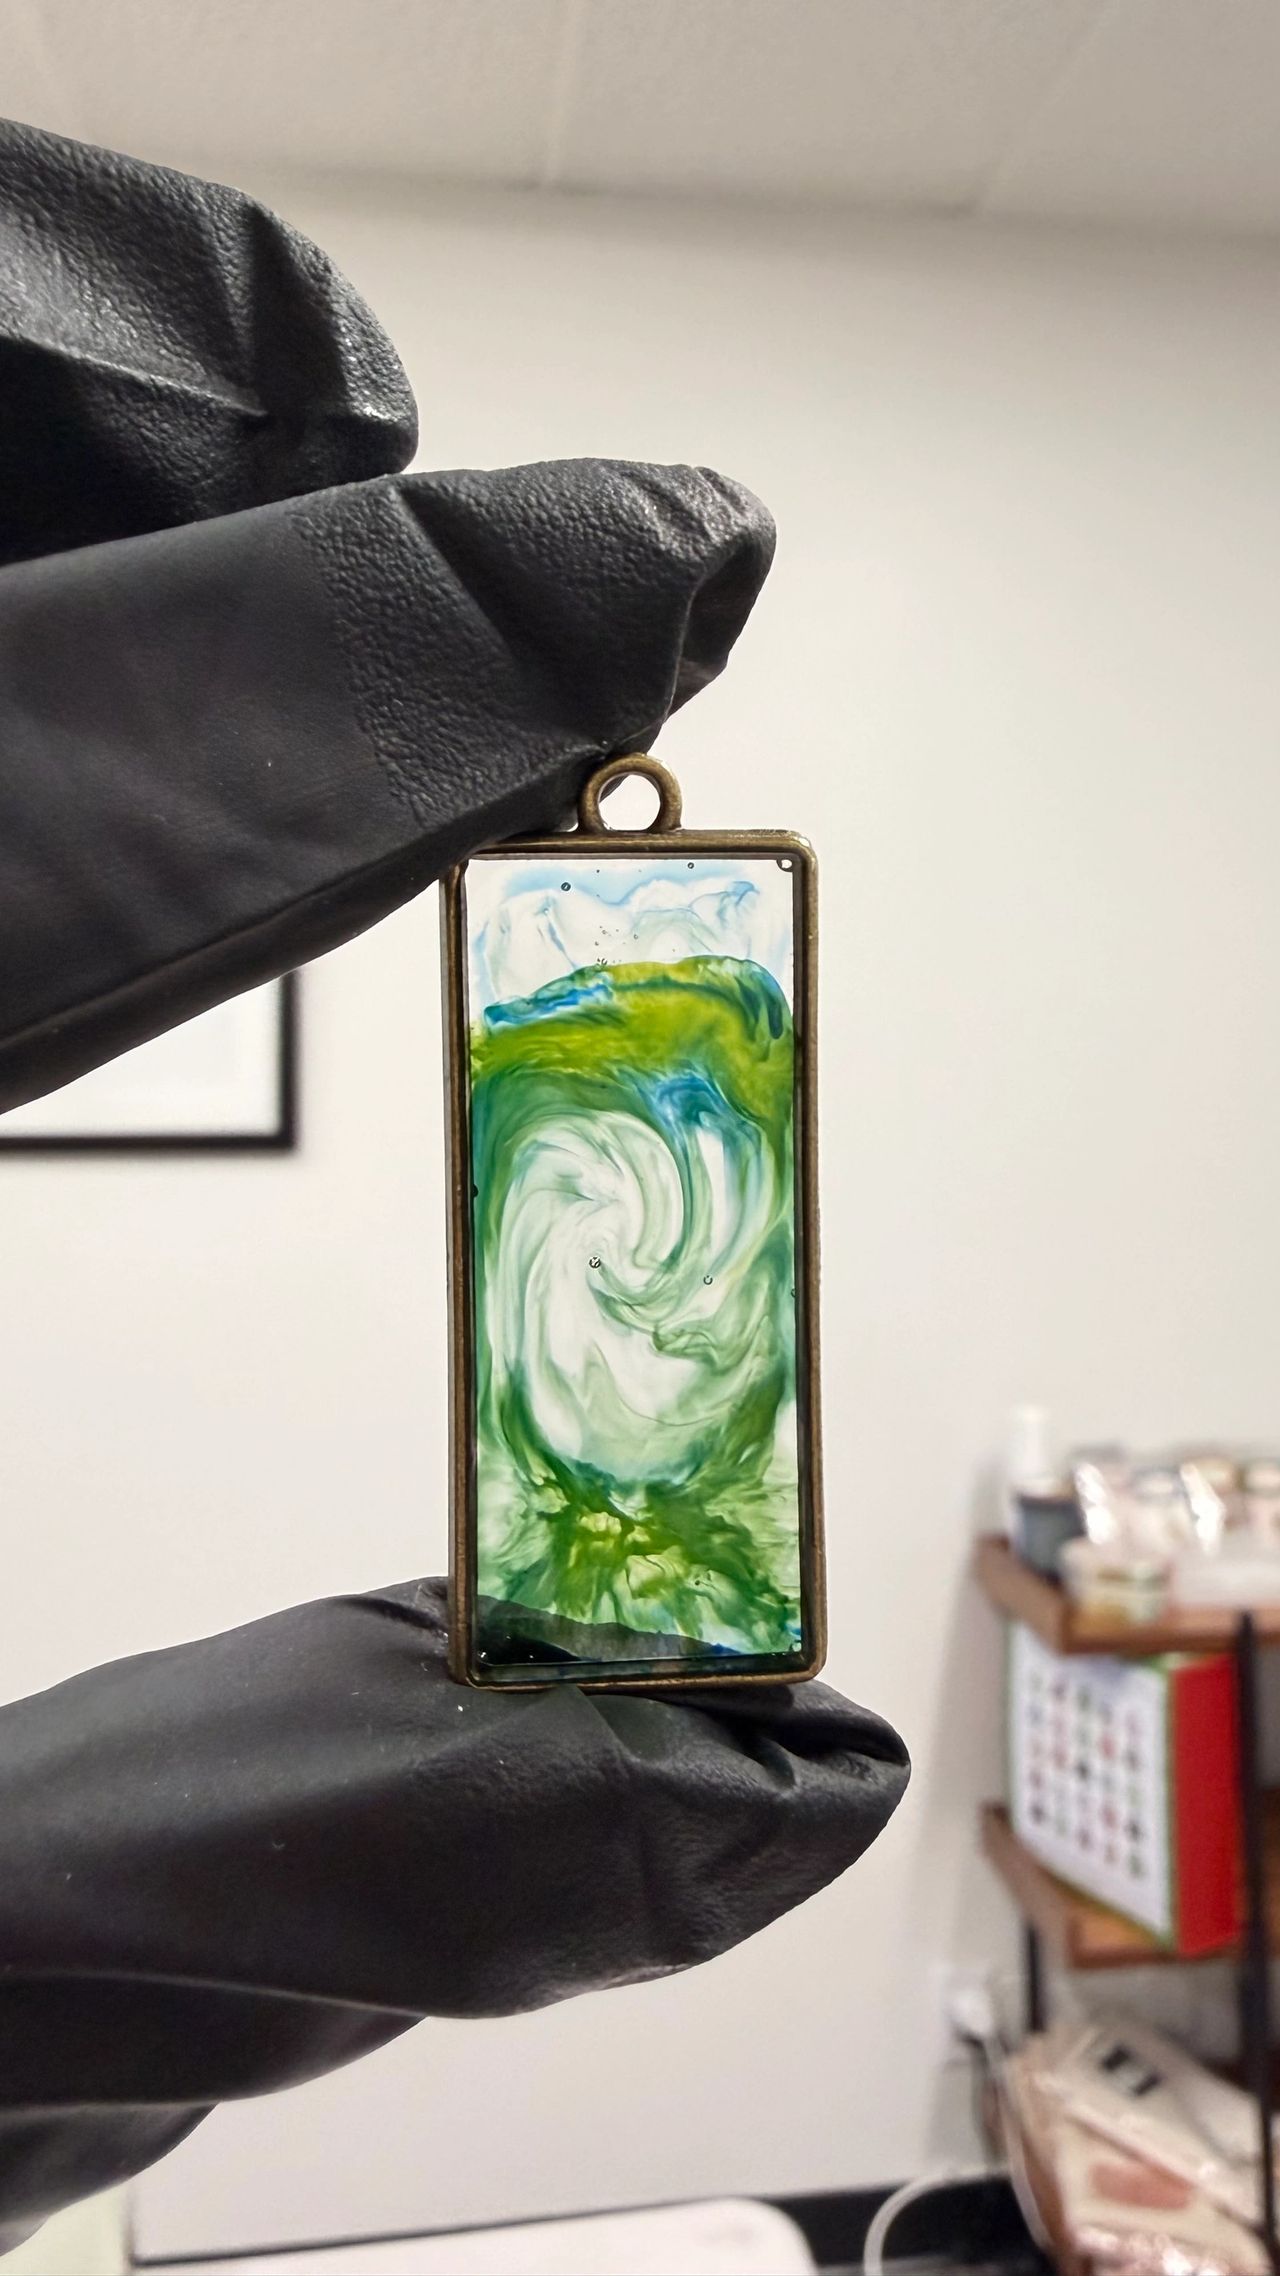
Technique 2: Let the Ink Move on Its Own
This was my favorite discovery.
Instead of stirring, I tried dropping ink into resin and… doing nothing.
What happened:
- The ink bloomed organically
- Soft edges formed without harsh lines
- The charm looked more painterly and natural
🎨 Creative rule of thumb:
If it already looks good—don’t touch it.
Technique 3: Layering for Depth
Once the first layer cured, I added a second layer.
How to layer successfully:
- Cure the first layer fully
- Add a clear or lightly tinted resin layer
- Drop ink strategically (not everywhere)
- Swirl lightly or tilt the mold
- Cure again
Why it works:
Layering creates visual depth, almost like floating color inside glass. This technique is perfect for necklace charms because the piece looks different from every angle.
Technique 4: Color Choices Matter (A Lot)
Not all acrylic inks play nicely together.
What worked best:
- High-contrast colors (teal + white, black + gold, pink + indigo)
- One dominant color + one accent
- White ink for soft, cloudy effects
What to avoid:
- Too many colors at once
- Thick or low-quality inks
- Mixing complementary colors too aggressively (hello, brown 😅)
Curing Tips (AKA How Not to Ruin the Piece)
- Cure between every layer
- Rotate the mold under the lamp to avoid soft spots or use a dual sided UV lamp
- If it’s tacky, add a thin clear coat and cure again
UV resin rewards patience—even though it pretends it doesn’t need it.
Finishing the Charms
Once fully cured:
- De-mold carefully
- Drill holes if needed (go slow!)
- Add jump rings or bails
- Admire the tiny universe you just created ✨
Final Thoughts: Experimentation Is the Technique
This wasn’t about perfection—it was about paying attention.
UV resin and acrylic inks are a conversation. Sometimes the resin leads. Sometimes the ink does. The magic happens when you let go just enough to see what they want to become.
If you try this technique, expect surprises. Some pieces will be stunning. Some will be… learning experiences. Both are wins.
And honestly?
Those experimental pieces often become the most interesting charms of all.
Happy creating 💖